User Guide
![]()
Introduction
Domsun is a Desktop Command Line Interface (CLI) program that allows users to manage tasks and modules.
Domsun is targeted at busy NUS students who want to manage their tasks and modules well to achieve their dream CAP.
Users will be able to browse and select modules, create and arrange tasks, add tasks to modules,
create reminders, calculate and set goals for their MCs / CAPs.
Contents
- Preliminaries
- General Functions
- Command Summary
- Usage
Daily Taskstodo- Add a todo to the task listdeadline- Add a deadline to the task listevent- Add an event to the task listlist- Print a list of added tasksdone- Mark a task as doneundone- Mark a task as undonefind- Find an event in the task listpostpone- Postpone a task to a later datereminder- Print tasks that are due soonsnooze- Delays reminder popup
Module PlannerGeneral Featuresadd- Add task(s) to module(s)clear- Clear the task listdelete- Delete a task from the task listedit- Modify attributes of an itemfocus- Change the context of the programload- Loads linked tasksstats- Prints Statisticshelp- Print help text of the commandsfancy- Switch the UI to the fancy mode (GUI-like CLI)plain- Switch the UI to the plain mode (pure-text CLI)next- Switch the target region to the next page (GUI mode only)prev- Switch the target region to the previous page (GUI mode only)unknown- Prints error messagebye- Quit the program
- Triggering the syntax reminder
- FAQ
Preliminaries
Installation
- Ensure that you have Java 11 or above installed.
- Download the latest version of
Domsunfrom Our Release Page. - If you are on Mac or Linux platforms, please ignore Step 4 to Step 6.
- If you are on Windows platform, we recommend using Windows Terminal instead of cmd.exe:
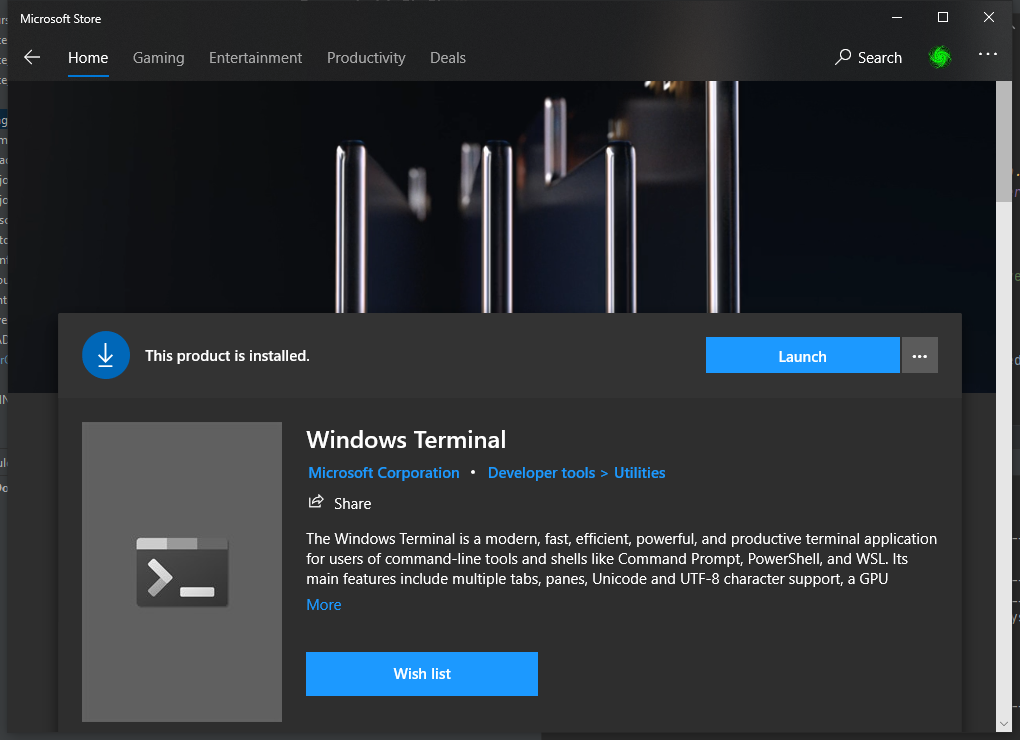
If you do not have Windows Terminal, try it out! It is fast and powerful, and enables the full features of ANSI text rendering by default, which our Domsun will be utilising. - If you insist on using
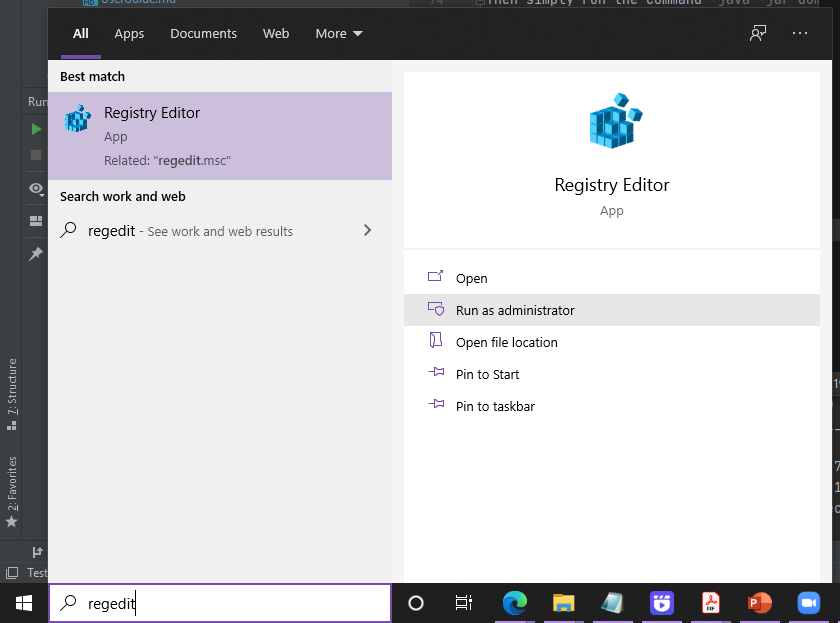
cmd.exeas your terminal on Windows, it also works, but you need some extra work by doing the following steps:- Type
regeditin your Search box, and clickRun as Administrator:
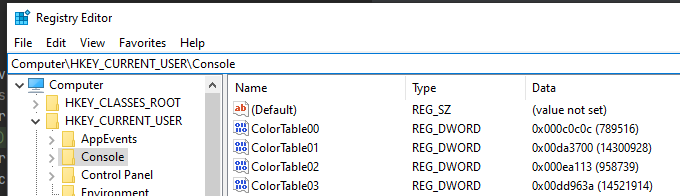
You can use other methods to open your registry editor as well. - Locate
Computer\HKEY_CURRENT_USER\Console:
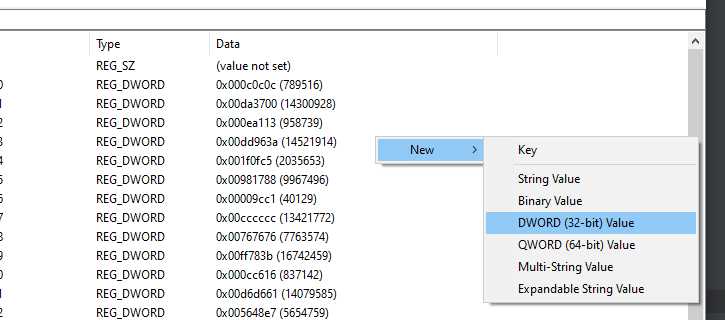
- Create a new
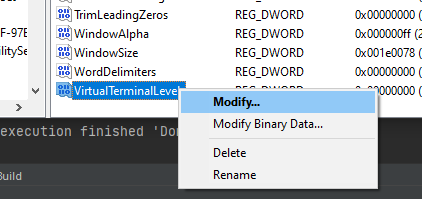
DWORDentry in the registry table (right click on the right) namedVirtualTerminalLevelif it is not present yet:
- Right click on the value you have just created, and click on
Modify:
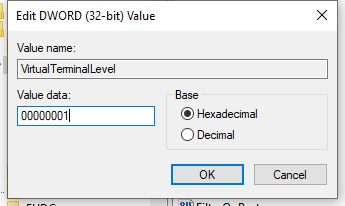
- Modify the value to be
00000001:
- Type
- Restart your cmd.exe by closing all cmd windows and re-open cmd.
- What did you just do?
- You just enabled programs opened through cmd.exe to inherit ANSI rendering options from cmd.exe, which is by default off. (The ANSI rendering for cmd.exe itself is by default on.)
- Microsoft used to enable this inheritance option by default. It is completely harmless.
- However, in recent Windows versions Microsoft decided to move this feature over to their newly developed Windows Terminal (which is cross-platform and more advanced. Yes it supports Linux commands as well).
- Why do you need such an option?
- ANSI escape codes are responsible for the colors and font settings in terminal applications.
- That is how the
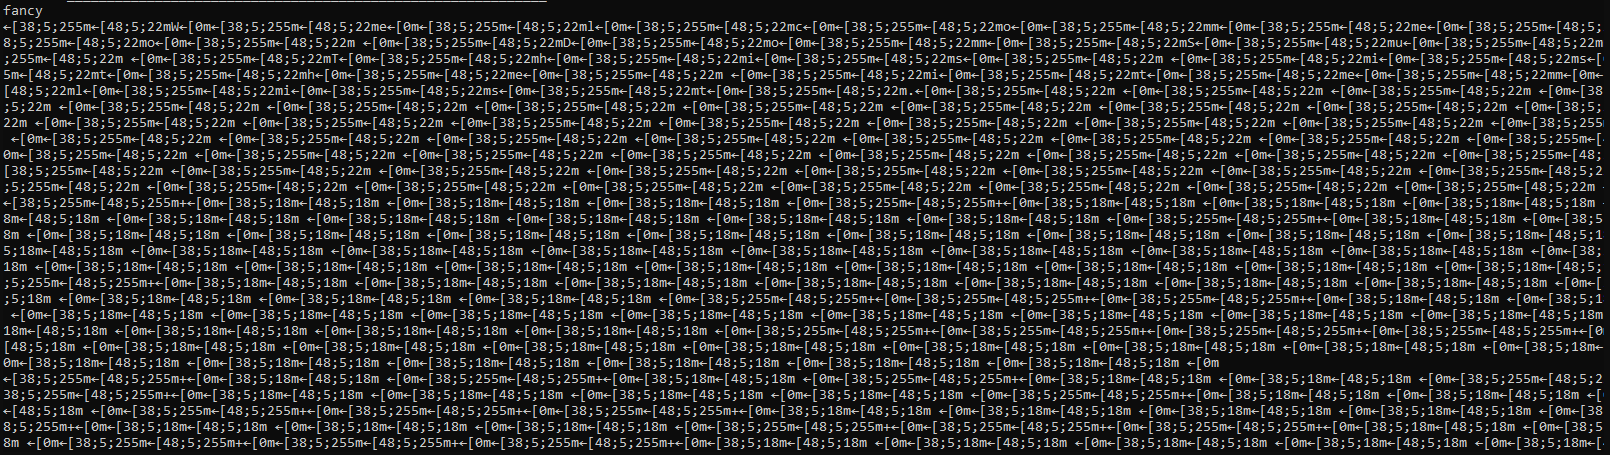
htopin Linux shows a colored UI. - Without enabling this option, all colors and fonts will return to their original form in plain text,
something like this:
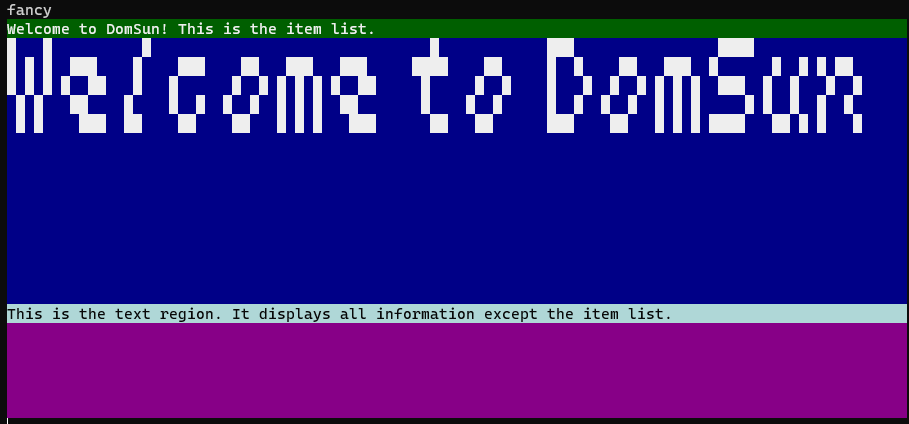
- We believe that you will be more comfortable with the option on… something like this:
- What if you failed to do the previous steps?
- No worries. Our Domsun starts up in plain text mode by default on Windows platform, so you will see something like this:

- The plain ui is perfectly usable with exactly the same functionalities as the colored one.
- If you have succeeded in following the previous steps, you should be able to type
fancycommand to switch to the colored UI, and typeplaincommand to switch back to plain text. - More on commands later :)
- No worries. Our Domsun starts up in plain text mode by default on Windows platform, so you will see something like this:
- What did you just do?
- Congratulations! You’re all set!
Java 11 and above is highly recommended, although Domsun might run on a lower version.
Running the program
Open your command line or terminal and navigate to the folder where you downloaded the jar file (e.g., ~/downloads).
Then simply run the command java -jar domsun.jar:
$ cd ~/downloads
$ ls
domsun.jar
$ java -jar domsun.jar
Note: You can also run Domsun by double clicking the
domsun.jarfile directly.
Domsun Tutorial
As a beginning, here is how Domsun works. It has 3 lists that you should take note of as shown below. (The lists shown are non-exhaustive, as there are other dynamic lists that are created based on the focus command. Do refer to focus section of this User Guide for more details).
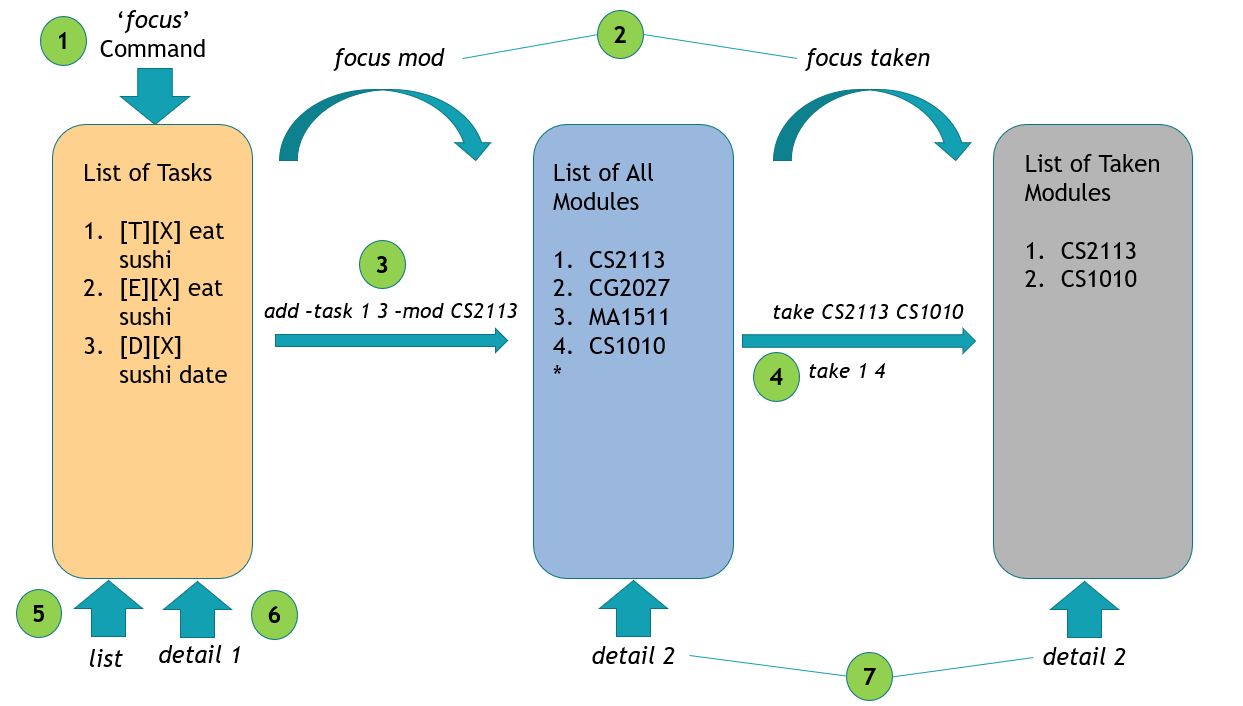
focuscommand focuses the app onto the list of tasks that you currently have. When starting the program for the first time, such a task list will be empty and you can create your own tasks using thetodo,eventordeadlinecommands. More on commands in later sections.- Likewise,
focus modcommand focuses the app on the entire list of modules available in NUS, whilefocus takenapplies a filter to the list of all modules, and collect all the taken modules into a dynamic list (a list of all your taken modules). There are other options available forfocuscommand, such asfocus selected. More on that later. - To add a task under a module, you may enter the command
add -task 1 3 -mod CS2113. 1 and 3 here are the indices of the tasks in your current list of focus. So be sure to have some task created and are focusing on the correct list before typing this command. - To mark modules as ‘taken’, you may enter
take CS2113 CS1010. Alternatively, you may use the indices method as before such astake 1 4to take the 1st and 2nd module available on the module list while focusing on such list by usingfocus modfirst. - The
listcommands follows the app’s current focus. If it is focusing on list of tasks, typinglistwill show all tasks. Likewise for modules and taken and more. - Typing
detail 1displays the details of the item in your current list of focus that has index 1. For example, when focusing on tasks list, this will display the details of the 1st task. - Similarly,
detail 2will display different results depending on your current focus as the index 2 represents Module CG2027 if you are focusing onmod, and represents Module CS1010 if you are focusing ontaken.
A to note before venturing into the libraries of commands that we have.
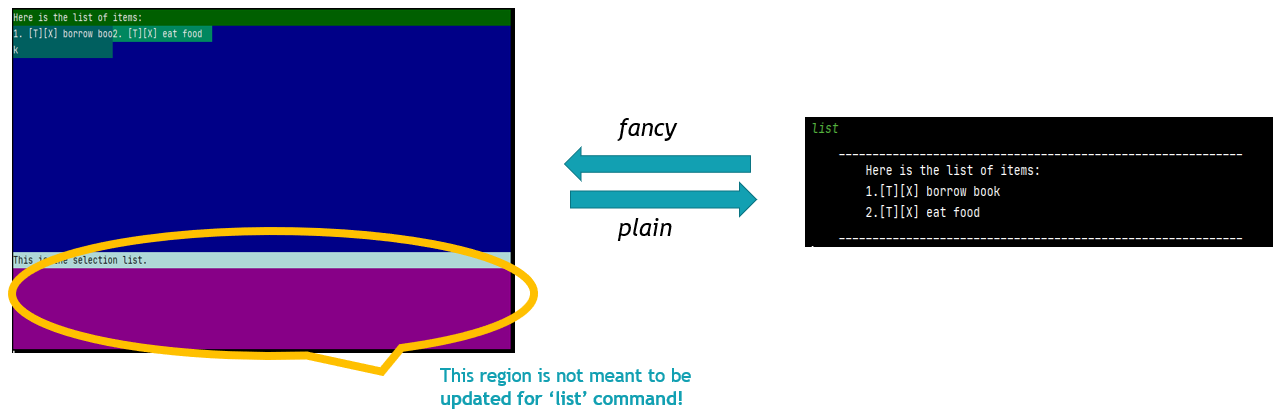
You can switch between fancy mode display, and plain display anytime during the program. During list command, you will be able to toggle between pages of fancy by using prev and next However, the current version of fancy mode is still in beta, hence, it is expected to not be able to fully display certain commands that are too long. such as help, detail,mc etc. Do look forward to the next update!
Syntax Formats
- Different commands update different regions of the fancy UI. Most noticeably,
listcommand only updates the upper region (the item list region), whilehelpcommand only updates the bottom region (the text region). - This is designed so that you will be able to refer to your text region when you are operating on the item list, without worrying that the text below will be flushed away.
- For example, if you did commands wrongly, the text region will display
invalid commanderror and show the correct syntax. When you are browsing through the list you will be able to refer to the syntax below. Please do not mistake that kept message as a newly generated error. - You will be able to toggle between pages of fancy by using
prevandnextif you have followed the Installation steps successfully, or if you are on Mac or Linux, or if you are on Windows but using non-integrated terminals such as gitbash or Windows Terminal. Otherwise, if you are using cmd.exe (command line) or ps.exe (PowerShell) on Windows, please stick with plain text UI. - For each feature syntax, each type of symbols represent different explanation of the syntax.
- The plain text (
example) represents compulsory names. For example, ifdo -stuff [index]is shown in the Syntax, you must type exactlydo -stuff, before typing any index. - The square bracket (
[]) represents parameters. Do not type the square bracket characters themselves in when using the feature. For example:
Inhelp [target],helpis a compulsory name, andtargetis its parameter. You can used any allowed name as atarget, depending on what command you are using. For options of choice of the parameter, you can refer to theNotessection of help text fromhelp, by typinghelp help. - The round bracket (
()) represents additional explanation of the parameter. For example:
Indetail [module code (for modules only) / index],for modules onlyis simply further explanation of themodule codeparameter. Usage example refer to help text fromhelpfeature. - The three dots (
...) represents that the parameter can be linked/chained together infinitely. For example:
Ingrade [index / code (for modules only)] [letter grade] ...,gradecan be followed by continuous list of[index / code (for modules only)] [letter grade]. Usage example refer to help text fromhelpfeature.
- The plain text (
General Functions
Addition and removal of tasks
The program allows user to add or delete tasks from the task list.
The program also provides shortcuts such as the clear command to delete tasks quickly.
Mark tasks as done or undone
The program allows users to mark tasks as done (denoted by [V]) or undone (denoted by [X]).
List tasks and reorder them by their date field
The program allows users to list tasks in ascending order or descending order with respect to their date values.
The program also allows the user to filter the task list and only display tasks within a specified date.
(this feature only applies to items with a valid parsable date, more on that later)
Deadlines, Events, and ToDo’s
The program allows users to create 3 different kinds of tasks, deadlines, events, and todos.
deadline and event consists of both description and date, while todo does not contain date.
The date field consists of a date part (such as Oct 13 1998), and a time part (such as 00:00).
If the time part is omitted during creation of the task, it will be set by default to 00:00.
You can use postpone or edit commands to change the date field later. (Not recommended. More on that later)
Auto-save and auto-load
The program saves the tasks list automatically every time the list changes.
When the program loads up, it looks for the last saved tasks list first and tries to load it.
Syntax reminder
The program can remind the user of the syntax of a command if the command is correct but the wrong syntax is present.
Module operations
The program allows users to list modules, mark modules as taken or untaken, and score grades for each module.
Find function
The program allows users to find items (tasks or modules) by keyword using the find command. More on that later.
Dynamic target
The program operates data dynamically. Users can operate on items as-is in the displayed sequence,
and need not follow the sequence of task creation or module addition.
For example, index 1 always refers to the first item in
the list you are currently focusing on, which can be dynamically updated. You do not have to remember which task was the one you added first.
GUI inside CLI (fancy UI mode)
The program has a fancy UI mode that accomplishes a GUI-like CLI interface using the ANSI escape code sequence.
The user can use fancy to switch to the GUI mode and use plain to switch to plain text CLI mode.
Link tasks to Modules
The program allows users to add some tasks to modules using the add command.
The tasks added to a module will appear in the module’s tasks field, which can be viewed using the detail command. More on that later.
The tasks in the module’s tasks field does not affect the main task list.
Reminders
The program allows users to set reminders at a certain time, or remind themselves of the most urgent tasks on start-up.
Command Summary
A cheat sheet of commonly used commands:
Daily Tasks
| Action | Format | Examples |
|---|---|---|
| todo | todo [description] |
todo borrow book |
| deadline | deadline [description] -by [time] |
deadline project submission -by 21/9/15 1:12 |
| event | event [description] -at [time] |
event concert -at May 13 2020 8:00 |
| list | list date [asc / desc / spec “date”] |
list date asc |
| done | done [index] |
done 2 |
| undone | undone [index] |
undone 2 |
| find | find [keyword] |
find exam |
| postpone | postpone [index] |
postpone 1 |
| reminder | reminder [on/off] |
reminder |
| snooze | snooze |
Module Planner
| Action | Format | Examples |
|---|---|---|
| take | take [index / module code] |
take CS2113T |
| untake | untake [index / module code] |
untake CS2113T |
| sel | sel [index / module code] |
sel 1 2 3 |
| unsel | unsel [index / module code] |
unsel CS1010 CS2113 |
| detail | detail [index / module code] |
detail CS2113T |
| grade | grade [-option] [module] [grade] {[module] [grade]...} |
grade -a CS2113 A CG1112 A- |
| goal | goal [-option] [total MC] [target CAP] [taken MC] [current CAP] |
goal -c 160 4.9 100 4.5 |
| mc | mc [-option] [-details] |
mc -p |
| cap | cap [-option] [module] [grade] {[module] [grade]...} |
cap -m CS2113 A CG1112 A- |
General Features
| Action | Format | Examples |
|---|---|---|
| add | add -task [index] -mod [module code] |
add -task 1 -mod CS2113 |
| clear | clear |
|
| delete | delete [index] |
delete 2 |
| edit | edit [-mod / -task] [index / code (for module only)] |
edit -mod CS2113 grade=A -task 1 description=do_homework type=event |
| focus | focus [deadline / todo / event / task / mod / selected / taken] |
focus deadline |
| load | load [module code] [task_string] |
load EE2028 [D][V]_Exam_(by:_Jan_11_2011_11:11) |
| stats | stats [target] |
stats |
| help | help [options] |
help deadline |
| fancy | fancy [option] |
fancy |
| plain | plain [option] |
plain |
| next | next [option] |
next |
| prev | prev [option] |
prev |
| bye | bye |
Usage
Features - Daily Tasks
todo - Add a todo task to the task list
Typing todo allows the program to parse the user’s input and create a todo object with
specified description. It will be appended to the end of the task list.
Notes:
- Todo description parameter here is compulsory.
Syntax:
todo [description]
Example of usage:
todo class
Expected outcome:
    ____________________________________________________________
        Got it. I've added this task:
        [T][X] class
        Now you have 1 tasks in the list.
    ____________________________________________________________
deadline - Add a deadline to the task list
Typing deadline allows the program to parse the user’s input and create a deadline object with
specified description and time. It will be appended to the end of the task list.
Notes:
- Deadline description and time parameters here are compulsory.
Syntax:
deadline [description] -by [time]
Example of usage:
deadline ddl -by 21/9/15 1:12
Expected outcome:
    ____________________________________________________________
        Got it. I've added this task:
        [D][X] ddl (by: Sep 15 2021 01:12)
        Now you have 1 tasks in the list.
    ____________________________________________________________
event - Add an event to the task list
Typing event allows the program to parse the user’s input and create an event object with
specified description and time. It will be appended to the end of the task list.
Notes:
- Event description and time parameters here are compulsory.
Syntax:
event [description] -at [time]
Example of usage:
event midterm exam -at May 13 2020 8:00
Expected outcome:
    ____________________________________________________________
        Got it. I've added this task:
        [E][X] midterm exam (at: May 13 2020 08:00)
        Now you have 1 tasks in the list.
    ____________________________________________________________
list - Print a list of added tasks
Typing list commands the program to print either all added tasks or tasks at a specified date.
The user can also control how the tasks printed are ordered with respect to date:
The asc parameter tells the program to list tasks in ascending order with respect to their date field.
The desc parameter tells the program to list tasks in descending order with respect to their date field.
The spec parameter tells the program to only list tasks with the specified value of the date field.
Notes:
- When updates are done on the list (e.g : new “todo” task is added), “list” need to be run again to see the result of the update.
- There are 2 main list in this application (i.e. task and module list). For more explanation, refer to the diagram on “Domsun Tutorial” on the UserGuide.
Syntax:
list
list date [asc / desc / spec "date"], where "date" can be in any common date format.
Example of usage:
list
Expected outcome:
    ____________________________________________________________
        Here is the list of tasks:
        1.[D][X] math exam (by: Oct 15 2020 10:30)
        2.[D][X] CS exam (by: Oct 18 2020 15:00)
        3.[E][X] exam review session (at: Oct 01 2020 08:00)
    ____________________________________________________________
Example of usage:
list date asc
Expected outcome:
    ____________________________________________________________
        Here is the list of tasks:
        1.[E][X] exam review session (at: Oct 01 2020 08:00)
        2.[D][X] math exam (by: Oct 15 2020 10:30)
        3.[D][X] CS exam (by: Oct 18 2020 15:00)
    ____________________________________________________________
Example of usage:
list date spec 10/15/20
Expected outcome:
    ____________________________________________________________
        Here is the list of tasks:
        1.[D][X] math exam (by: Oct 15 2020 10:30)
    ____________________________________________________________
done - Mark a task as done
Typing done allows the user to mark the task at a specified index as done.
Note:
- index can be an integer number or a letter (
Aoracorresponds to 1). - If the index starts with a letter, it will be treated as a numerical value mapped A to 1 and Z to 26. For example, “done apple” is equivalent to “done 1” and “done C4” is equivalent to “done 3”.
Syntax:
done [index]
Example of usage:
done 1
Expected outcome:
    ____________________________________________________________
        Nice! I've marked this task as done:
        [D][V] ddl (by: Sep 15 2021 01:12)
    ____________________________________________________________
undone - Mark a task as undone
Typing undone allows the user to mark the task at a specified index as undone.
Note:
- index can be an integer number or a letter (
Aoracorresponds to 1). - If the index starts with a letter, it will be treated as a number mapped A to 1 and Z to 26. For example: “undone apple” is equivalent to “undone 1” and “undone C4” is equivalent to “undone 3”.
Syntax:
undone [index]
Example of usage:
undone 1
Expected outcome:
    ____________________________________________________________
        Nice! I've marked this task as undone:
        [D][X] math exam (by: Oct 15 2020 10:30)
    ____________________________________________________________
find - Find an event in the task list
Typing find commands the program to search through the task list and print all tasks with the
specified keyword. If there is no task with such a keyword, [NOT FOUND] will be printed instead.
Notes:
- Keyword here means any word (time/description) on task list.
- Ensure that you are referring to the most updated task list.
- If keyword does not exist on the task list, a “no found” message will be shown.
Syntax:
find [keyword]
Example of usage:
find exam
Expected outcome (found):
    ____________________________________________________________
        Tasks with the specified keyword are:
        1.[D][X] math exam (by: Oct 15 2020 10:30)
        2.[D][X] CS exam (by: Oct 18 2020 15:00)
        3.[E][X] exam review session (at: Oct 01 2020 08:00)
    ____________________________________________________________
Expected outcome (not found):
    ____________________________________________________________
        Tasks with the specified keyword are:
        Your specified item is not found in the current list.
    ____________________________________________________________
postpone - Postpone a task by index
Typing postpone delays a task specified by the user or by default a day.
Note:
- Option
hfor an hour. Optionwfor a week. Optionyfor a year. - The tasks should consist of date type i.e. events or deadline tasks, do not work on todo tasks.
- Each postpones delays the tasks by a day, an hour, a week or a year.
- Does not work with custom date unless you have updated the task with the preferred date format.
- When a letter appears without a number as its parameter, the letter will be treated as a numeric value mapped A to 1 and Z to 26. For example, “postpone boy” is equivalent to “postpone 2” and “postpone h” is equivalent to “postpone 8”.
Syntax:
postpone [index]
postpone (h/w/y) [index]
Example of usage:
postpone 1
Expected outcome:
_________________________________________________________
    I've postpone this task:
    [D][X] project submission (by: Sep 16 2021 01:12)
____________________________________________________________
Example of usage:
postpone h 1
Expected outcome:
____________________________________________________________
    I've postpone this task:
    [D][X] project submission (by: Sep 16 2021 02:12)
____________________________________________________________
Example of usage:
postpone w 1
Expected outcome:
____________________________________________________________
    I've postpone this task:
    [D][X] project submission (by: Sep 23 2021 02:12)
____________________________________________________________
Example of usage:
postpone y 1
Expected outcome:
____________________________________________________________
    I've postpone this task:
    [D][X] project submission (by: Sep 23 2022 02:12)
____________________________________________________________
reminder - Print tasks that are due soon
Typing reminder prints the tasks that are due within a certain time range or to activate the reminder.
Notes:
- The reminder popup is set by default to emerge every 5 minutes.
Syntax:
reminder
reminder [on/off]
Example of usage:
reminder
Expected outcome:
    ____________________________________________________________
        Auto-reminder: Here are the tasks due within 3 days:
        (do not want to see this so often? try "snooze")
        No task within 3 days from now
        Reminder is currently on.
    ____________________________________________________________
Example of usage:
reminder on
Expected outcome:
    ____________________________________________________________
        Auto-reminder: Here are the tasks due within 3 days:
        (do not want to see this so often? try "snooze")
        No task within 3 days from now

    ____________________________________________________________
Example of usage:
reminder off
Expected outcome:
    ____________________________________________________________
        Auto-reminder: Here are the tasks due within 3 days:
        (do not want to see this so often? try "snooze")
        No task within 3 days from now
        Reminder is currently off.
    ____________________________________________________________
snooze - Delays reminder popup
Typing snooze delays reminder popup by a default of 1 minute.
The reminder popup will remind in every 6 minutes.
Notes:
- No additional parameter is needed.
- If there is a parameter, you should expect “Invalid Command” message.
Syntax:
snooze
Example of usage:
snooze
Expected outcome:
__________________________________________________________________________
    I've snoozed the reminder for 1 minute. Will remind you in 6 minutes.
__________________________________________________________________________
Features - Module Planner
take - Take module
Typing take marks specified module(s) as taken.
Notes:
- Index must be a positive integer referencing an existing item on the current list.
- Module code must be a legitimate NUS module.
Syntax:
take [index(es) / module code(s) (for modules only)]
Example of usage:
take CS2113 CS2113T
Expected outcome:
    ____________________________________________________________
        Your "taken" list has been changed, "list" it again to see effects.
        Module: CS2113: now taken
        Module: CS2113T: now taken
    ____________________________________________________________
untake - Untake module
Typing untake marks specified module(s) as not taken.
Notes:
- Index must be a positive integer referencing an existing item.
- If modules that are not taken are input, the module will still be marked as “no longer taken”.
Syntax:
untake [index(es) / module code(s) (for modules only)]
Example of usage:
untake CS2113T
Expected outcome:
    ____________________________________________________________
        Your "taken" list has been changed, "list" it again to see effects.
        Module: CS2113T: no longer taken
    ____________________________________________________________
sel - Select items by index
Typing sel selects the items specified.
Notes:
- Index must be a positive integer referencing an existing item.
- Module code needs to represent legitimate NUS module. Otherwise, an error message can be
Syntax:
sel [index(es) (for the currently listed items) / module code(s) (for modules only)]
Example of usage:
sel 1 2 3
Expected outcome:
    ____________________________________________________________
    Your "selected" list has been changed, "list" it again to see effects.
    Item 1: borrow book: now selected
    Item 2: eat: now selected
    Item 3: jumping: now selected
    ____________________________________________________________
unsel - Unselect items
Typing unsel marks items specified as unselected.
Notes:
- Index must be a positive integer referencing an existing item.
- Item need to first be selected using “sel” for “unsel” to function properly.
Syntax:
unsel [index(es) (for the currently listed items) / module code(s) (for modules only)]
Example of usage:
unsel 1 2 3
Expected outcome:
    ____________________________________________________________
    Your "selected" list has been changed, "list" it again to see effects.
    Item 1: borrow book: no longer selected
    Item 2: eat: no longer selected
    Item 3: jumping: no longer selected
    ____________________________________________________________
detail - Prints item detail
Typing detail prints the details of a specified item.
Notes:
- Index should be a positive integer. Otherwise you should expect an error message
- You must reference EXISTING tasks or module when using this command. For example:
Syntax:
detail [module code (for modules only) / index]
Example of usage:
detail 1
Expected outcome:
    ____________________________________________________________
    Here are the details you requested:
    Item 1: [T][X] borrow book
    ____________________________________________________________
Example of usage:
detail CS2113T
Expected outcome:
    _____________________________________________________________________________________________________
    Here are the details you requested:
    Item: CS2113T Software Engineering & Object-Oriented Programming 4MC
    "This module introduces the necessary skills for systematic and rigorous development of software sys
    tems. It covers requirements, design, implementation, quality assurance, and project management aspe
    cts of small-to-medium size multi-person software projects. The module uses the Object Oriented Prog
    ramming paradigm. Students of this module will receive hands-on practice of tools commonly used in t
    he industry, such as test automation tools, build automation tools, and code revisioning tools will
    be covered.
    Tasks: [NOT FOUND]
    ______________________________________________________________________________________________________
grade - Add grade to course or module
Typing grade allows the user to add a grade to the user’s taken course or module.
Note:
- Modules need to be “taken” first before a grade is applied.
- Grade and module code/index are compulsory parameters.
- Grades and module code need to be acceptable grades and modules in NUS. For example: If “grade CS2113 Z” or “grade CS9999 A” is input, an error message will be displayed.
- If “grade CS2113 Z” or “grade CS9999 A” is input, error message will be displayed.
Syntax:
grade
grade [-option] [module] [grade] {[module] [grade]...}
option: -s(show, default), -a(add)
Example of usage:
grade -a CS2113 A- CG1112 A-
Expected outcome:
____________________________________________________________
    Grade operation on the specified modules:
    1. CS2113   A-
    2. CG1112   A-
____________________________________________________________
Example of usage:
grade
Expected outcome:
____________________________________________________________
    Grade operation on the specified modules:
    You did not specify modules, looking for your taken modules...
    1. CG1112   A-
    2. CS1010   A
    3. CS1231   B
    4. CS2040C  A
    5. CS2113   A-
____________________________________________________________
goal - Calculate how far the user is from his or her target CAP
Typing goal allows the user to calculate how far the user is from his/her target CAP.
Note:
- All values on the parameters should be a positive integer. Otherwise, you should expect an error message.
- Both total MC and target CAP are compulsory parameters.
- CAP values need to be within 0 to 5.
Syntax:
goal -total [total MC] [target CAP] {-taken [taken MC] [current CAP]}
Example of usage:
goal -total 160 4.9
Expected outcome:
____________________________________________________________
    Your required average CAP is: 4.91
    Try "cap" to see your current cap!
    Jia you! :D
____________________________________________________________
mc - Prints MCs
Typing mc prints the number of MCs based on the selected option.
By default, this command focuses on the entire module list. In order to print the MC of taken modules,
do remember to enter ‘focus taken’ before proceeding with this command.
Notes:
- Default mc command prints the total mc that exists in the list of taken modules.
- To print out a detailed list of mc belonging to the taken modules, ensure you have entered “focus taken”.
Syntax:
mc [-option]
option: -d(detailed)
Example of usage (when there are modules in the target):
mc
Expected outcome:
    ____________________________________________________________
    Here is the total MC:
    22
    ____________________________________________________________
Example of usage (when there are modules in the target):
mc -d
Expected outcome:
    ____________________________________________________________
    Here is the total MC:
    EE1001: 4MCs
    EE1001X: 4MCs
    EE1002: 4MCs
    EE1003: 4MCs
    EE1111: 6MCs
    ____________________________________________________________
cap - Prints CAPs
Typing mc prints the calculated CAP for courses based on the selected option.
Note:
- Index should be a positive integer. Otherwise, you should expect an “invalid command” error message.
- You must reference existing tasks or modules when using this command. For example: If “list” shows only 2 tasks but you try to use “-task 3” as a parameter for “add”, you should expect an “index out of range” error message because “3” is out of range for your task list. Similarly, if there is no mod called CS9999 in the module list and you try to use “-mod CS9999” as a parameter for “add”, you should expect a “not found” error message.
Syntax:
cap [index / code (for modules only)] [letter grade]
Example of usage (when there are modules in the target):
cap
Expected outcome:
    ____________________________________________________________
        Calculate cap on specified modules:
        You did not specify modules, looking for graded modules in your taken modules...
        CG2027: null
        CS2113: null
        EE2028: A+
        GER1000: A
        MA1513: B
        CAP = 4.7
    ____________________________________________________________
Example of usage (when there are modules in the target):
cap CS2113 A CS1010 A-
Expected outcome:
    ____________________________________________________________
        Calculate cap on specified modules:
        This module is completed and you cannot modify it again: [COMPLETED]CG1112
        Module: CS2113: (hypothetical)A
        CAP = 5
    ____________________________________________________________
Features - General Features for both Daily Tasks & Module Planner
add - Add task to module
Typing add adds specified task(s) to specified module(s).
Notes:
- Index should be a positive integer. Otherwise, you should expect an “invalid command” error message.
- You must reference EXISTING tasks or modules when using this command. For example: If “list” shows only 2 tasks but you try to use “-task 3” as a parameter for “add”, you should expect an “index out of range” error message because “3” is out of range for your task list. Similarly, if there is no mod called CS9999 in the module list and you try to use “-mod CS9999” as a parameter for “add”, you should expect a “not found” error message.
- Both parameters here (i.e. task and mod) are compulsory.
- Once a task is added to a module, it is unlinked from the task list.
Syntax:
add -task [index(es)] -mod [module code(s)]
Example of usage:
add -task 1 2 -mod CS2113 CS2113T
Expected outcome:
    ____________________________________________________________
    I have added the specified tasks to the specified modules.
    CS2113 << tasks: borrow book; eat;
    CS2113T << tasks: borrow book; eat;
    ____________________________________________________________
clear - Clear the task list
Typing clear results in the program deleting all added tasks from the task list.
Note:
- “clear fancy” can only be used in fancy UI mode.
- Extra inputs after “clear” will get an “invalid command” error unless it contains the word “fancy” (case insensitive). For example: “clear domsun” results in an “invalid command” error. If “clear fancy domsun” is input in, “domsun” will be ignored and “clear fancy” will be executed. If “clear MyFancyBoy” is input in, “clear fancy” will be executed.
Example of usage:
clear
Expected outcome:
    ____________________________________________________________
       Nice! I've cleared all tasks from the list and left modules alone.
    ____________________________________________________________
delete - Delete a task from the task list
Typing delete deletes the task with specified index from the current task list.
Note:
- index should be an integer number or a letter (
Aoracorresponds to 1). Otherwise you should expect an error message. - You must reference EXISTING tasks when using this command. For example: If “list” shows only 2 tasks but you try to use “delete 3”, you should expect an “index out of range” error message because “3” is out of range for your task list.
Syntax:
delete [index]
Example of usage:
delete 1
Expected outcome:
____________________________________________________________
    Noted. I've removed this task:
    [T][X] class
    Now you have 3 tasks in the list.
____________________________________________________________
edit - Modify attributes of an item
Typing edit modifies the attributes of an task or module.
Note:
- Fields for “-task” include “description”, “type”, “selected”, “weekly” and “done”.
- Fields for “-mod” include “grade”, “su”, “selected” and “taken”.
- No space allowed around the “=” sign. Use “_” in for spaces in “[field=new_value]” parameters.
- Modules and task referenced need to exist.
- Removing a specified linked task from the module does not delete the task from the task list.
Syntax:
edit [-mod / -task] [index / code (for module only)] [field=new value]
No space allowed around "=". Use "_" in place of space for the "[field=new value]" parameters
Example of usage:
edit -mod CS2113T grade=A
Exepected outcome:
____________________________________________________________
    Trying to modify the attribute(s) you specified:
    Working on Module: CS2113T
    CS2113T: grade = A AND taken = true;
    (The module must be taken in order to have a grade);
____________________________________________________________
Example of usage:
edit -task 1 description=do_homework
Expected outcome:
____________________________________________________________
    Trying to modify the attribute(s) you specified:
    Working on Task: [D][X] do homework\ (by: Sep 16 2021 01:12)
    do homework: description=do homework;
____________________________________________________________
list
____________________________________________________________
    Here is the list of items:
    1.[T][X] do homework
    2.[T][X] blah
____________________________________________________________
Example of usage:
edit -task 1 type=event
Expected outcome:
____________________________________________________________
    Trying to modify the attribute(s) you specified:
    Working on Task: [D][X] do homework (by: Sep 16 2021 01:12)
    do homework: description=do homework;
____________________________________________________________
list
____________________________________________________________
    Here is the list of items:
    1.[E][X] do homework (at: Sep 16  2021 01:12)
    2.[T][X] blah
____________________________________________________________
focus - Change the context of the program
Typing focus changes the context that all other commands are based on the specified target.
If no parameter is provided, the program will focus on task.
Other commands such as list, done, sel, etc. all operate based on the current focused context.
Notes:
- This function is used together with “list” to see the result of the “focus”.
- For more explanation, refer to the diagram on “Domsun Tutorial” on the UserGuide.
Syntax:
focus
focus [deadline / todo / event / task / mod / selected / taken]
Example of usage:
focus mod
Expected outcome:
    ____________________________________________________________
    Now we are focusing on:
    mod
    ____________________________________________________________
Example of usage:
focus
Expected outcome:
    ____________________________________________________________
    Now we are focusing on:
    task
    ____________________________________________________________
load - Loads linked tasks
Typing load loads linked tasks to ONE specified module without adding them to the main task list
Notes:
- This command should only be used if you are highly familiar with the save file and you want to manually edit linked tasks to a specific module
- We do NOT recommend using this command on a daily basis
Syntax:
load [module code] [task_string]
Example of usage:
load EE2028 [D][V]_Exam_(by:_Jan_11_2011_11:11)
Expected outcome:
____________________________________________________________
    Added Tasks:
    [D][V] Exam (by: Jan 11 2011 11:11)
    for module: EE2028;
    Try "detail EE2028" to check it out!
____________________________________________________________
Example of usage:
load EE2028 [T][X]_test1,[T][V]_test2
Expected outcome:
____________________________________________________________
    Added Tasks:
    [T][X] test1
    [T][V] test2
    for module: EE2028;
    Try "detail EE2028" to check it out!
____________________________________________________________
stats - Prints Statistics
Typing stats prints the percentage of the task completed.
Notes:
- Module entered should exist. Otherwise, you should expect a “Module Not Found” error message.
- If the command entered is stats alone, ensure that you are focusing on the tasks list by typing “focus”.
Syntax:
stats [-option] [module code]
option: -mod
Example of usage (when focused on tasks list, and no task is completed):
stats
Expected outcome:
    ____________________________________________________________
    Here are the statistics:
    [0.0%]
    ____________________________________________________________
Example of usage (when checking specific modules, and all the tasks that are tagged to the module are completed):
stats -mod CS2113
Expected outcome:
    ____________________________________________________________
    Here are the statistics:
    [100.0%]
    ____________________________________________________________
help - Print help text of the commands
Typing help allows the user to either print a list of available commands,
or print the details of a specified command.
Notes:
- If unknown command is put in as “target”, general help of all commands will be displayed.
Syntax:
help
help [target]
Example of usage:
help
Expected outcome:
    __________________________________________________________________________________________________________________
        Here are all available commands:
        Command: add  Description: Add task(s) to module(s): Add specified task(s) to specified module(s).
        Command: bye  Description: Quit the program
        Command: cap  Description: Calculate CAP for courses based on selected option.
        Command: clear  Description: Clear the task list, or clear the bottom text region for the fancy
        UI.
        Command: complete  Description: Mark a module as completed
        Command: deadline  Description: Add a deadline to the task list
        Command: delete  Description: Delete a task from the task list
        Command: detail  Description: Print the details of a specified item.
        Command: goal  Description: Calculate how far the user is from his/her target CAP
        Command: done  Description: Mark a task as done
        Command: edit  Description: Modify the attributes of an item (task / module), or operate on one
        linked task of a module
        Command: event  Description: Add an event to the task list
        Command: fancy  Description: Switch to a fancy Cli (requires the shell to support ansi codes).
        Command: grade  Description: Modify grade to the user's taken course/module.
        Command: find  Description: Find an event in the task list with the specified keyword
        Command: focus  Description: Change context. Changes the target of other commands to the specified
        target
        Command: postpone  Description: postpone task a day by default
        Command: help  Description: Print the list of available commands, or print the details of a
        specified command
        Command: stats  Description: Print statistics for a given modules/tasks
        Command: list  Description: Print a list of items depending on the current Focus
        Command: load  Description: Loads linked tasks to ONE specified module without adding them to the
        main task list
        Command: mc  Description: Print the number of MCs based on selected option.
        Command: next  Description: Switch the target region to the next page, keeping other regions
        unchanged.
        Command: plain  Description: Switch to a plain Cli.
        Command: prev  Description: Switch the target region to the previous page, keeping other regions
        unchanged.
        Command: reminder  Description: List out events and deadlines tasks that are due within 3 days
        Command: sel  Description: Make selection: Add specified item(s) to the selection.
        Command: snooze  Description: Delay the reminder pop up by 1 minute.
        Command: take  Description: Take module(s): Mark specified module(s) as taken.
        Command: todo  Description: Add a todo to the task list
        Command: undone  Description: Mark a task as undone
        Command: unknown  Description: Prints the error message for an unrecognized command for debugging
        purposes
        Command: unsel  Description: Cancel selection: Make specified item(s) no longer selected.
        Command: untake  Description: Untake module(s): Mark specified module(s) as not taken.
        Use "help [target]" to see details :) Try "help help"!
    _____________________________________________________________________________________________________________________
Example of usage:
help list
Expected outcome:
    ___________________________________________________________________________________________
        Name: list
        Description: Print a list of items depending on the current Focus
        Syntax:
        list
        list date [asc / desc / spec "date"(any common date format)]
        Notes:
        1. When updates are done on the list (e.g : new "todo" task is added), "list" need to be run again
        to see the result of the update.
        2. There are 2 main list in this application (i.e. task and module list). For more explanation,
        refer to the diagram on "Domsun Tutorial" on the UserGuide.
        Usages:
        1. "list" >> list all added items
        2. "list date asc" >> list items with a "date" field in ascending order
        3. "list date spec Oct 5 2020" >> list items with specific "date" field of Oct 5 2020
    ____________________________________________________________________________________________
fancy - Switch the UI to the fancy mode
Typing fancy switches the UI to the fancy mode (GUI-like CLI interface).
This command has no effect if the UI is already in fancy mode.
The fancy mode only shows correctly if your terminal supports ANSI escape codes.
Note:
- This feature can be used on Linux or Mac only. Error numbers will be displayed on Windows.
Syntax:
fancy
Example of usage:
fancy
Expected outcome:
the UI switches to fancy mode (GUI-like CLI interface).
plain - Switch the UI to the plain mode
Typing plain switches the UI to the plain mode (pure-text CLI interface).
This command has no effect if the UI is already in plain mode.
The plain mode shows correctly on all terminals.
Note:
- Extra inputs after “plain” will be ignored. For example: If “plain bye” is input in, “bye” will be ignored, and “plain” will be executed.
Syntax:
plain
Example of usage:
plain
Expected outcome:
The UI switches to plain mode (pure-text CLI interface).
next - Switch the target region to the next page
Typing next switches the target region to the next page, should a next page exist.
This command has no effect on pure text CLI mode.
Note:
- This function should be used in FANCY UI only.
Syntax:
next [region]
region: i(item list), s(selection), a(all, default)
Example of usage:
next
Expected outcome (GUI mode only):
Both regions of the GUI are switched to the next page if the next page is available.
Example of usage:
next i
Expected outcome (GUI mode only):
The item list region (top) of the GUI is switched to the next page if the next page is available.
prev - Switch the target region to the previous page
Typing prev switches the target region to the previous page, should a previous page exist.
This command has no effect on pure text CLI mode.
Note:
- This function should be used in FANCY UI only.
Syntax:
prev [region]
region: i(item list), s(selection), a(all, default)
Example of usage:
prev
Expected outcome (GUI mode only):
Both regions of the GUI are switched to the previous page if a previous page is available.
Example of usage:
prev i
Expected outcome (GUI mode only):
The item list region (top) of the GUI is switched to the previous page if a previous page is available.
unknown - Prints error message
Typing unknown or any string that is not a command will trigger the unknown command.
The unknown command prints an error message for debugging purposes, it is also the default behavior of the program
when it fails to recognize the user’s command.
Note:
If the program recognizes the command successfully, yet fails to find the required parameters,
it will not trigger this unknown command. It will print a syntax error and remind the user of
the correct syntax instead.
Syntax:
unknown
[anything that is not a command]
Example of usage:
who is duke?
Expected outcome:
    ____________________________________________________________
        OOPS, I don't know what that means :-( Try "help"!
    ____________________________________________________________
bye - Quit the program
Typing bye results in the program saving the current task list to a local file named
./data/duke.txt, and then quit the program.
Note:
- Extra inputs after “bye” will be ignored. For example: If “bye domsun” is input in, “domsun” will be ignored, and “bye” will be executed.
Example of usage:
bye
Expected outcome:
    ____________________________________________________________
        Bye. Hope to see you again soon!
    ____________________________________________________________
Triggering the syntax reminder
Typing a correct command with the wrong syntax will trigger the syntax reminder.
Example of usage:
deadline -by 10-10-10
Note that the command deadline is a correct command, but:
- Description is missing
- Parameter name is wrong
Expected outcome:
    ____________________________________________________________
        Invalid Command! Please check the syntax.
        deadline [description] -by [time]
    ____________________________________________________________
FAQ
Q: How do I transfer my data to another computer?
A: Send the data folder in your program directory to the program directory on your new device.
Q: How do I run this program?
A: To run this program execute the jar file by ‘java -jar domnus.jar’